
An App Integration gives an external system secure, machine-to-machine access to the SpeakUp Public API. This article covers creating one, retrieving its credentials, and revoking it.
Who this is for
Administrators who need to connect an external system to SpeakUp, such as a case management platform, a data warehouse, or an internal reporting tool.
At the end you will have a client ID and client secret that your integration can exchange for an access token.
Before you start
- The Public API package must be enabled for your organisation. Contact your Customer Success Manager if you are not sure by clicking 'Support' and 'Contact support'.
- You must have the Administrator role.
- Decide what the integration needs to do before you create it. Access levels are set at creation.
Choose the settings
An App Integration is configured with an authentication method and separate access levels for Issues and for Users and Groups. Permissions are enforced by the API, so a request that falls outside the granted access is rejected.
Issues access
| Level | What it allows | Use it for |
|---|---|---|
| Read only | Viewing Issues and related data. | Reporting, analytics, and audit integrations that must never change data in SpeakUp. |
| Full access | Viewing and updating Issues and related data. | Two-way integrations that write changes back into SpeakUp, such as closing an Issue from an external system. |
Users and Groups access
| Level | What it allows | Use it for |
|---|---|---|
| Read only | Viewing Users and Groups. | Integrations that read your directory but never change it. |
| Full access | Creating, updating, and disabling Users, and managing Groups. | SCIM provisioning. An identity provider cannot provision with read only access. |
Grant the minimum each integration needs. If a reporting tool only reads Issues, give it read only access and nothing more.
Authentication method
The authentication method determines how your system obtains a token.
| Method | Use it when |
|---|---|
| Client credentials | Your system calls the API directly, machine to machine. This covers most integrations, and SCIM with identity providers such as Microsoft Entra ID. |
| Authorisation Code Flow | Your identity provider connects to SCIM through the OAuth 2.0 authorisation code flow, for example Okta. |
Setting up SCIM? See what is SCIM provisioning and when should I use it? for which method your identity provider needs.
Create the App Integration
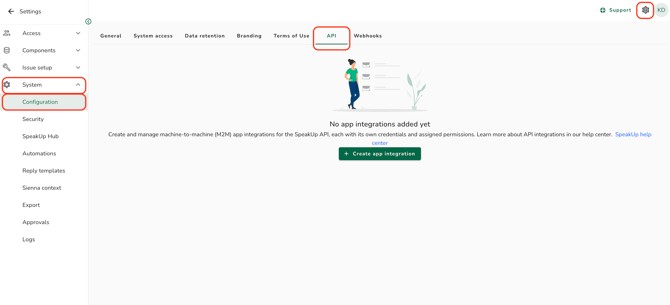
- Go to "Settings" > "System" > "Configuration" and select the API tab.
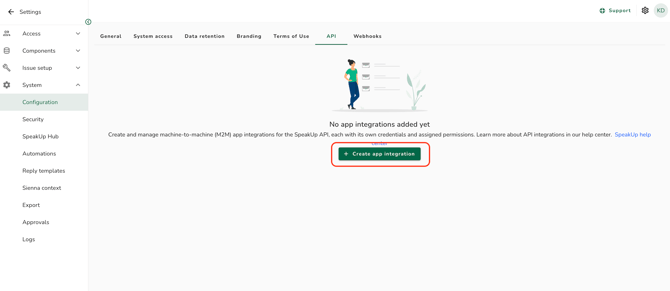
- Click "Create app integration".
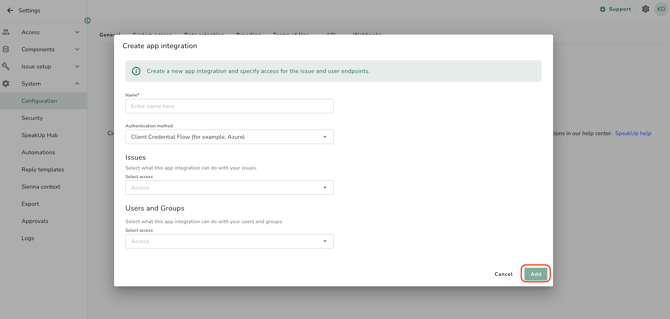
- Enter a Name. Names must be unique and can contain letters, numbers, and spaces only. Use something that identifies the external system, for example Case Management Sync.
- Select the Authentication method.
- Select the Issues access level.
- Select the Users and Groups access level.
- Click Add.
Retrieve your credentials
After creation you are taken to the App Integration detail page, which shows the Client ID, the Client Secret, and the Token Endpoint your system will call to obtain a token.
These values remain available on this page, so you can return to it later if you need to copy them again. To reopen it, go to Settings > System > Configuration > API and click the integration name.
The detail page also shows a ready-to-use cURL command for requesting an access token. Copy it and replace <client_secret> with your client secret.
Store the client secret in a secret manager, never in source control or a shared document. Anyone holding these credentials can access the API with the permissions you granted.
Check that it worked
Run the cURL command from the detail page. A successful response returns an access token that is valid for 1 hour (3600 seconds).
Include that token on every API request:
Authorization: Bearer <access_token>Your application must request a new token when the current one expires. Do not store a single token permanently.
Revoke an App Integration
Deleting an App Integration permanently revokes its API access.
- Go to Settings > System > Configuration > API.
- Click the name of the integration to open its detail page.
- Click Delete App Integration and confirm.
The credentials are removed and any tokens already issued stop working immediately. Delete an integration when the external system is decommissioned, or if you believe the client secret has been exposed.
Common problems
| What you see | What it means | What to do |
|---|---|---|
| The token request is rejected | The client ID or client secret does not match. | Reopen the detail page and copy both values again. Check that no whitespace was included. |
FeatureNotEnabledError |
The Public API package is not enabled for your organisation. | Contact your Customer Success Manager. |
ForbiddenError on a request that should work |
The integration was created with a lower access level than the request needs. | Check the access levels on the detail page. Updating Issues requires full access for Issues, and provisioning Users requires full access for Users and Groups. |
TokenExpiredError |
The access token is older than 1 hour. | Request a new token. Build token refresh into your integration. |
| The integration name is rejected | The name is already in use, or contains characters other than letters, numbers, and spaces. | Choose a different name. |
Next steps
- How do I make my first API request?
- Retrieving Issues for reading Issue data
- Updating Issues for writing changes back
- API error reference
- How do I configure webhooks? to have SpeakUp notify your system when an Issue changes