
Campaigns is part of the SpeakUp Paths offering. If you are interested in knowing more about this package, contact your Customer Success Manager by clicking 'Support' and 'Contact support'.
To begin with Campaigns, you need to be assigned the "Campaign manager" role to create a Campaign. Your Administrator can grant you this role. See What are Campaigns? for an overview of how Campaigns work.
To grant a user the needed role:
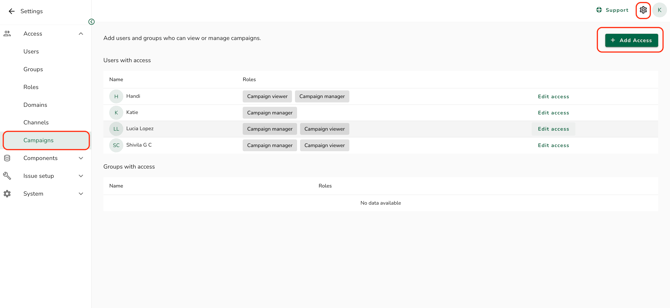
- Open the "Settings" menu and select "Campaign" and click "Add Access"
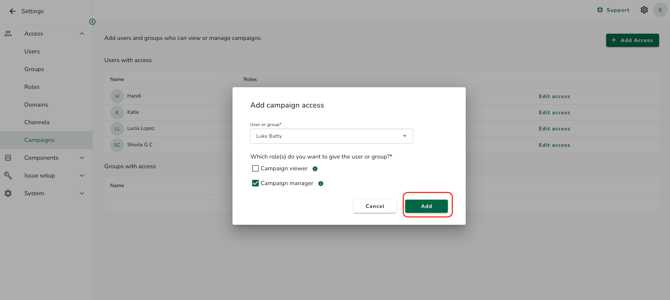
- Select the user you want to add and the role, then click "Add"
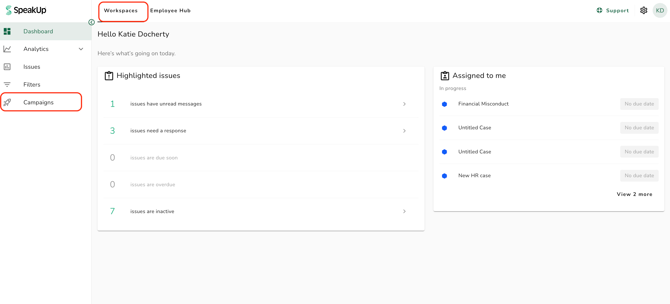
Now the user has been granted a Campaigns role, they will be able to see the 'Campaigns' option within their Workspaces menu.
To create a Campaign:
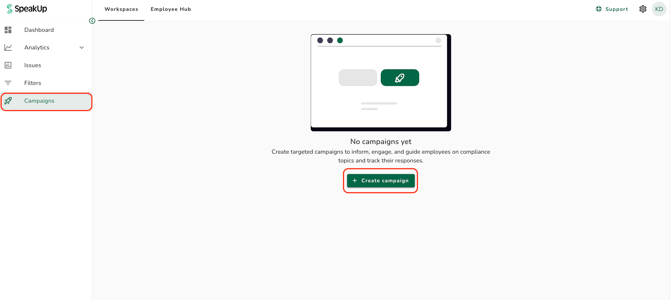
- Click "Campaigns" and "+ Create campaign"
To create the Content:
- Enter a name for your campaign in the "Campaign name" field, this will be shown to the targeted users
- Select a form from the "Campaign form" dropdown. (How do I create a Campaign form?)
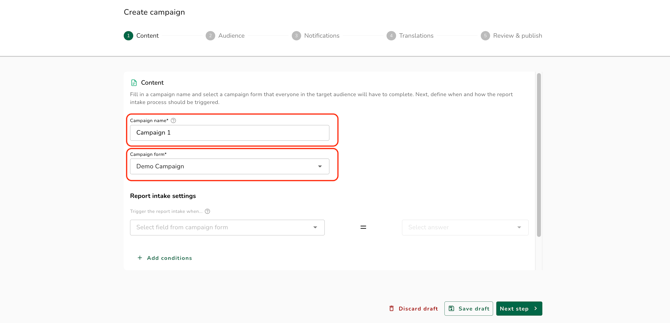
Report intake settings:
You can configure when employees should be redirected to the report intake flow after submitting the form. For each condition, select a campaign question and the answer value that should trigger the intake.
- Click "+ Add condition" to add more than one trigger condition.
- When you add a second condition, a modal titled "How do you want to combine the conditions?" appears. Select "Any one condition can apply (OR)" to trigger the intake when at least one condition is met, or "All conditions must apply (AND)" to require every condition to be met. Click "Continue" to confirm. Click "Cancel" to discard the second condition and return to the single-condition state.
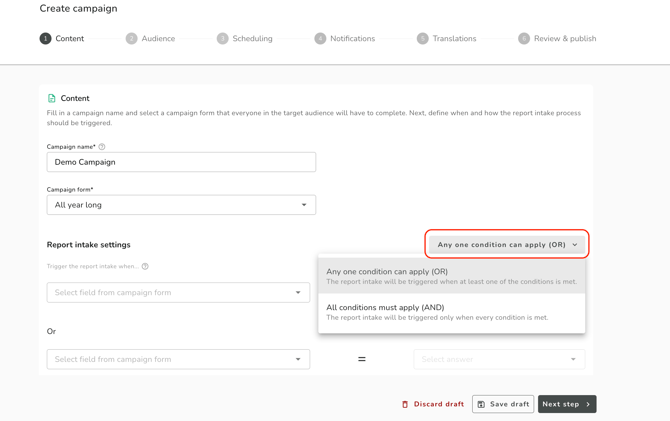
- Adding a third or subsequent condition does not show the modal again, the previously chosen operator continues to apply.
- To change the operator after setting it, click the operator button (e.g. "All conditions must apply (AND)") at the top right of the section.
- To remove a condition, click "Remove condition" below it.
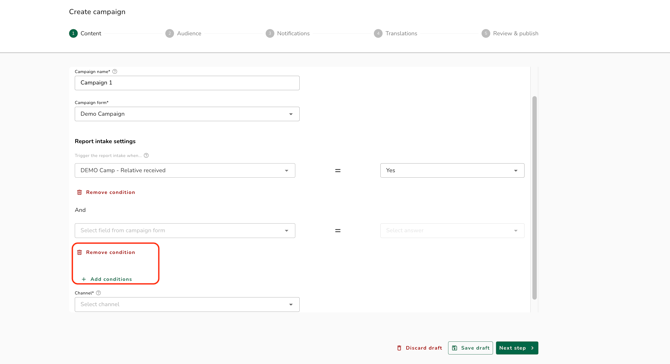
Channel:
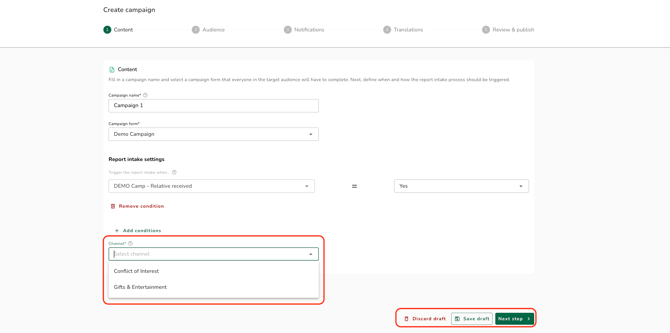
- If you configured at least one trigger condition, select a "Channel" from the dropdown. Only Paths channels are listed (How do I create a Channel for disclosure submissions?). A channel is required when trigger conditions are configured, but not otherwise.
- Click "Next step" to continue to the Audience step. You can also click "Save draft" to save your progress without continuing.
Audience:
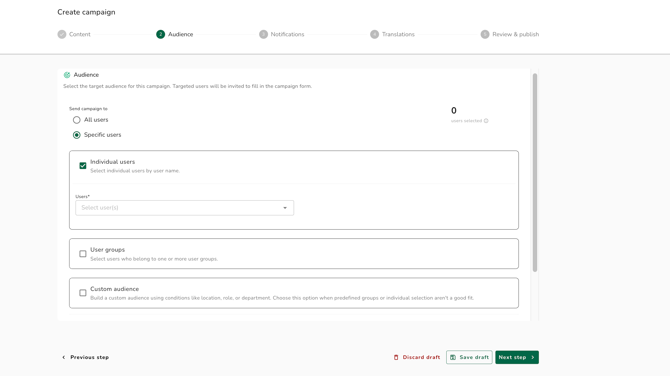
- Define your target audience. You can target:
- All users
- Specific users
- Specific groups (How do I create a User Group?)
- Users matching custom attribute filter
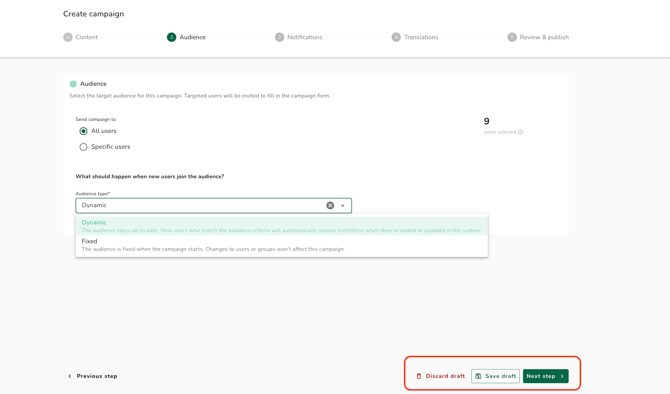
Select the audience type:
Dynamic (default): The audience is re-evaluated continuously after publish. Employees who qualify later will automatically receive an Assignment.
Fixed: The audience is resolved once at publish. Employees who join or qualify later will not receive an Assignment.
Click "Next step" to continue to the Scheduling step.
Scheduling:
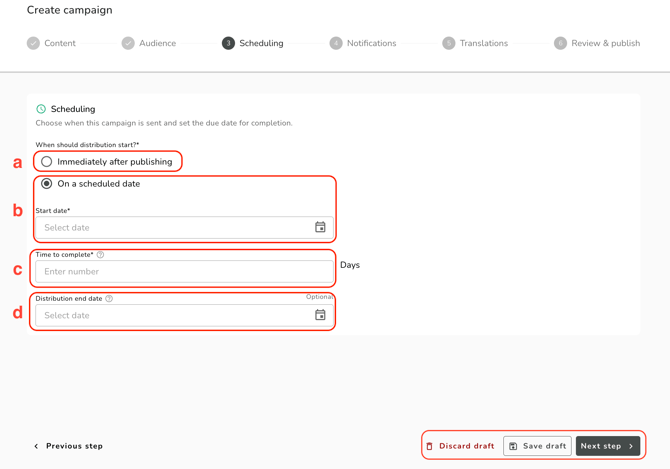
The Scheduling step lets you configure when your campaign starts and how long employees have to complete their assignment.
"When should distribution start?", select:
-
-
"Immediately after publishing": the campaign goes Active and assignments are created as soon as you publish.
-
"On a scheduled date": enter a future date and time in the "Start date" field. The campaign will be set to Planned on publish and go Active automatically on the date you choose.
-
"Time to complete": enter the number of days employees have to complete their assignment. This is used to calculate each employee's due date.
-
"Distribution end date": (dynamic audience only) Optionally enter an end date to stop creating new assignments after a certain date. Employees who already have an assignment can still complete it after this date.
-
Click "Next step" to continue to the Notifications step.
The start date must be in the future at the time you click "Publish campaign". If you are editing a Planned campaign and the configured start date has passed, you will need to update it before republishing.
Notifications:
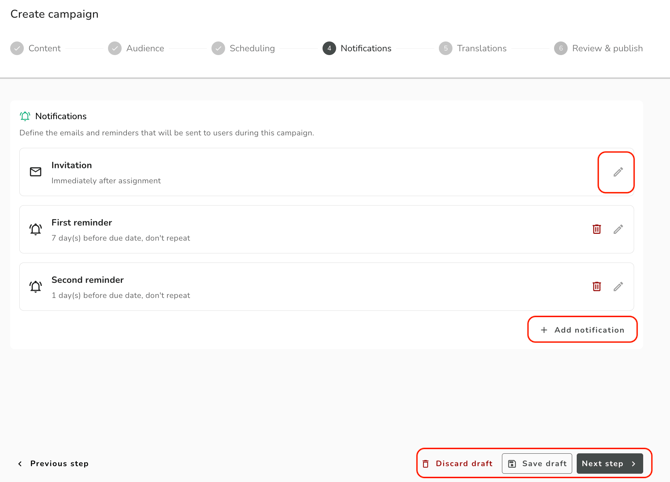
The Notifications step shows a list of notifications that will be sent to employees. By default, three notifications are configured:
-
Invitation
-
First reminder
-
Second reminder
Click the notification to edit:
-
Name: for reminders, you can enter a custom name. The Invitation name cannot be changed.
-
Subject and Email body: the content of the email. Click the "Full name", "Campaign name", or "Due date" chips to insert a dynamic tag at the current cursor position. Dynamic tags are substituted with the recipient's individual values when the email is sent.
-
CC manager: check this box to automatically CC the recipient's manager on this email.
-
When (reminders only): configure when the reminder fires — a number of days after the assignment is created, before the due date, or after the due date.
-
Repeat (reminders only): optionally repeat the reminder on a daily, weekly, or other cadence until the assignment or campaign is completed.
To add a custom reminder, click "+ Add reminder". You can have up to 5 reminders in total. To remove a reminder, click the trash icon on its row. The Invitation cannot be removed.
Click "Save" to apply your changes and then click "Next step" to proceed to the Translations step.
Translations:
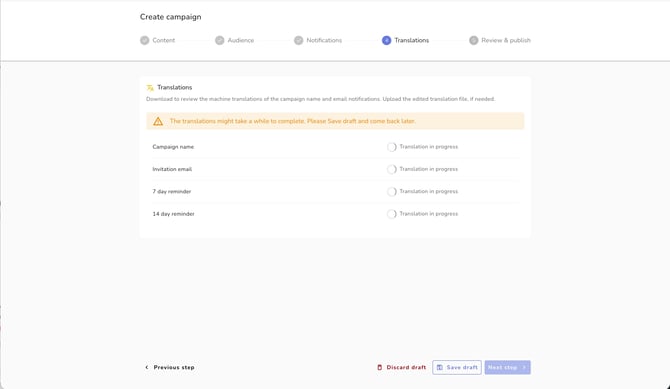
The Translations step has a separate translation file for each translatable item: the campaign name, the invitation, and each reminder. The system will take some time to translate the texts, we advise to save the draft and come back later to continue.
To review and/or adjust the translation:
-
Select "Download translation file" to download a file with the default-language content, edit the file to amend or add translations for other languages.
-
To upload the file with your adjustments if needed, select "Upload translation file". Uploading translation files is not required to publish.
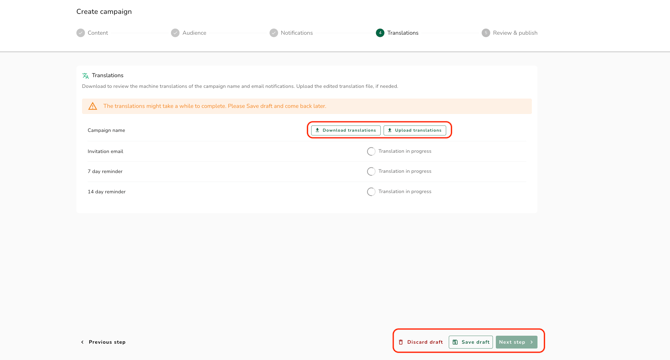
Click "Next step" to continue to the Review & publish step.
Translation processing can take a significant amount of time. You cannot publish the campaign until processing is complete. If translations are still processing, save the campaign as a draft and return to publish it later.
Review & publish:
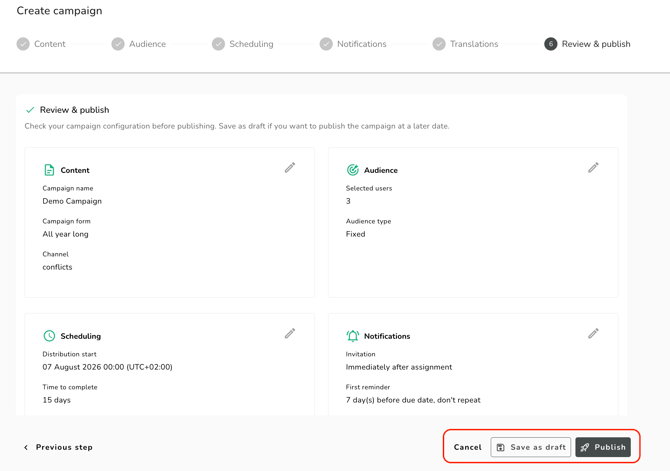
Review the summary of all campaign settings, including the scheduling configuration and notifications.
-
Click "Publish campaign" to publish.
-
If "Immediately after publishing" was selected, the campaign status changes to Active, assignments are created for all targeted employees, and the invitation email is sent immediately.
-
If "On a scheduled date" was selected, the campaign status changes to Planned. Assignments will be created and the invitation sent automatically on the configured start date.
- A campaign is saved as a Draft from the moment it is created. You can close and return to it at any time before publishing, or click "Save draft" on any step to save your progress. You can return to the previous screen by clicking "Previous step"
- Draft campaigns can be deleted from the campaign detail page.
- Published campaigns cannot be deleted.
- Active campaigns cannot be edited. A Planned campaign can be edited (with the same scope as a Draft) until it goes Active.
- A Planned campaign can be cancelled before it goes Active. Cancelling a Planned campaign permanently deletes it and cannot be undone.
- All notification fields (subject and body) must be filled in before the campaign can be published. Default content is pre-filled for all notifications.
- Notification emails are sent in each employee's preferred language if a translation exists. If no translation is available for that language, the default language of English is used.
- If a Campaign form has no fields, it cannot be selected in the Content step. You can create the Campaign form by following the steps How do I create a Campaign form?
Campaigns is part of our SpeakUp Paths offering. If you are interested in knowing more about this package, contact your Customer Success Manager by clicking 'Support' and 'Contact support'